
Compact Bike Navigation for Road Bikes
Table of Contents
- What Makes Compact Bike Navigation for Road Bikes Different
- The Best Bike Navigation for Beginners: What to Look For First
- How to Use Turn-by-Turn Navigation on a Bike: A Step-by-Step Setup
- Smartphone vs Dedicated Bike Computer: Which Belongs on Your Bars
- Mounting Compact Bike Navigation on Standard and Non-Standard Handlebars
- Battery Life, Screen Brightness, and Signal Reliability in Practice
- Common Mistakes When Setting Up Compact Bike Navigation
- Frequently Asked Questions
Last Updated: October 4, 2026
What Makes Compact Bike Navigation for Road Bikes Different
Compact bike navigation for road bikes is a small, lightweight device that mounts on your handlebars and gives turn-by-turn directions without turning your ride into a screen-staring session. At Beeline Velo, we built our whole approach around that idea: a compact form factor, a bright screen, and an app-based system that keeps your phone stowed.

The real difference comes down to size, weight, and how much information the device forces you to process at speed.
Size, Weight, and the Road Bike Cockpit
A road bike cockpit has very little free space: drop bars, a stem, an out-front mount, a light, and a bell all compete for the same few centimeters. A compact device shrinks the footprint.
Weight matters less than marketing suggests, a few grams won't slow you down.
The practical takeaway: choose a device that fits your bars first, then worry about features.
The Best Bike Navigation for Beginners: What to Look For First
The best bike navigation for beginners is one you can set up in ten minutes and read at a glance while moving. Beginners consistently overbuy, dozens of data fields, half never used. Simpler is faster to learn and easier to trust.
Here are the specs that actually matter when you're starting out:
- Display readability: Can you read it in direct sunlight with sunglasses on?
- Glove-friendly controls: Physical buttons or a touchscreen that works with gloves
- Battery life: At least a full day of riding on one charge
Display Readability and Glove-Friendly Controls
A bright screen is not a luxury. It's the difference between glancing down for half a second and squinting for three. Look for a high-contrast LCD backlight and a simple interface with two or three data fields, not twelve.
Glove-friendly controls matter more in cold weather than most guides admit. Capacitive touchscreens often fail with winter gloves; physical buttons or a minimal touch interface work better. If you ride year-round, test the controls with your actual gloves.
How to Use Turn-by-Turn Navigation on a Bike: A Step-by-Step Setup
Using turn-by-turn navigation on a bike means loading a route, mounting your device, and letting it guide you with simple cues instead of a full map. Setup takes about ten minutes the first time, then seconds after that.
Total time: 10-15 minutes for first setup Difficulty: Beginner
- Charge the device fully. A partial charge fails mid-ride, which is the fastest way to lose trust in any navigation tool.
- Pair the app. Open the companion app and connect via Bluetooth connectivity. This step syncs your routes and settings.
- Plan or import your route. Draw a route in the app or import a GPX file from a route-planning site.
- Mount the device. Attach the handlebar mount and clip the device in. Check that it's secure before you roll.
- Start the ride and follow the cues. The device shows a simple arrow and distance to the next turn, not a distracting full map.
- Let it reroute if you miss a turn. Good navigation recalculates automatically rather than leaving you stranded.
Loading Routes and GPX Files Before You Ride
GPX files are the standard format for sharing and importing bike routes. Whether you found a route online, downloaded it from a club, or built one in a planning tool, load it before you leave the house.
A common mistake is loading the route and assuming it's correct. Always check the elevation data and the first few turns in the app.
Smartphone vs Dedicated Bike Computer: Which Belongs on Your Bars
A dedicated bike computer wins for most regular riders, mainly because it protects your phone and your battery. Your phone can navigate, but it drains fast under GPS load, and a handlebar-mounted phone is exposed to vibration, rain, and crash damage.
Here's how the two options compare in practice:
| Factor | Smartphone | Dedicated Bike Computer |
|---|---|---|
| Battery drain | High under GPS load; screen-on mapping can consume a large share of a phone's charge over a multi-hour ride | Low; compact units are built around a small screen and a low-power chipset |
| Weather resistance | Limited; most phones carry only splash resistance | IPX7 waterproof options are common |
| Vibration risk | High for camera and screen; optical image stabilization is the first thing to fail | Built for handlebar vibration |
| Cost | Free app, phone you own | One-time device purchase |
| Distraction | Notifications and calls | Navigation only |
| Sensor integration | Depends on the app; radar and light pairing is inconsistent across platforms | ANT+ and Bluetooth sensor pairing is standard on most dedicated units |
| Best for | Occasional short rides | Regular riders and commuters |
The trade-off is real. A phone is free if you already own one, and free apps work. But if you ride most days, the phone becomes a liability, a dedicated unit keeps it safely in a pocket.
How Compact Units Handle Radar, Lights, and Safety Sensors
This is where the comparison stops being about screen size and starts being about what the device does on a busy road. Many riders pair a rear-facing radar with a tail light so the head unit warns them about approaching vehicles.
A few practical points to check before you buy:
- Protocol support. Look for ANT+ and Bluetooth Smart (BLE) on the spec sheet. Radar, speed, cadence, and heart-rate sensors use one or both, and a unit supporting only one protocol locks you out of half the accessories on the market.
- Simultaneous connections. A compact unit should hold navigation, radar, and a light network at once without dropping the route. Cheaper units sometimes drop one connection when a second sensor joins.
- Light-network control. Some head units can switch a paired smart tail light between solid and flashing modes, or turn it on automatically when a ride starts, a small feature that saves fumbling with a separate light button at dusk.
If you ride mostly solo on quiet roads, sensor integration may not matter. If you ride in traffic, on group rides, or at dawn and dusk, it's worth more than an extra data field.
Mounting Compact Bike Navigation on Standard and Non-Standard Handlebars
Mounting is where compact devices earn their keep, but non-standard bars are where most mounts fail. Standard 31.8mm round bars accept almost any clamp. Aero bars, integrated cockpits, and odd-shaped carbon bars do not.
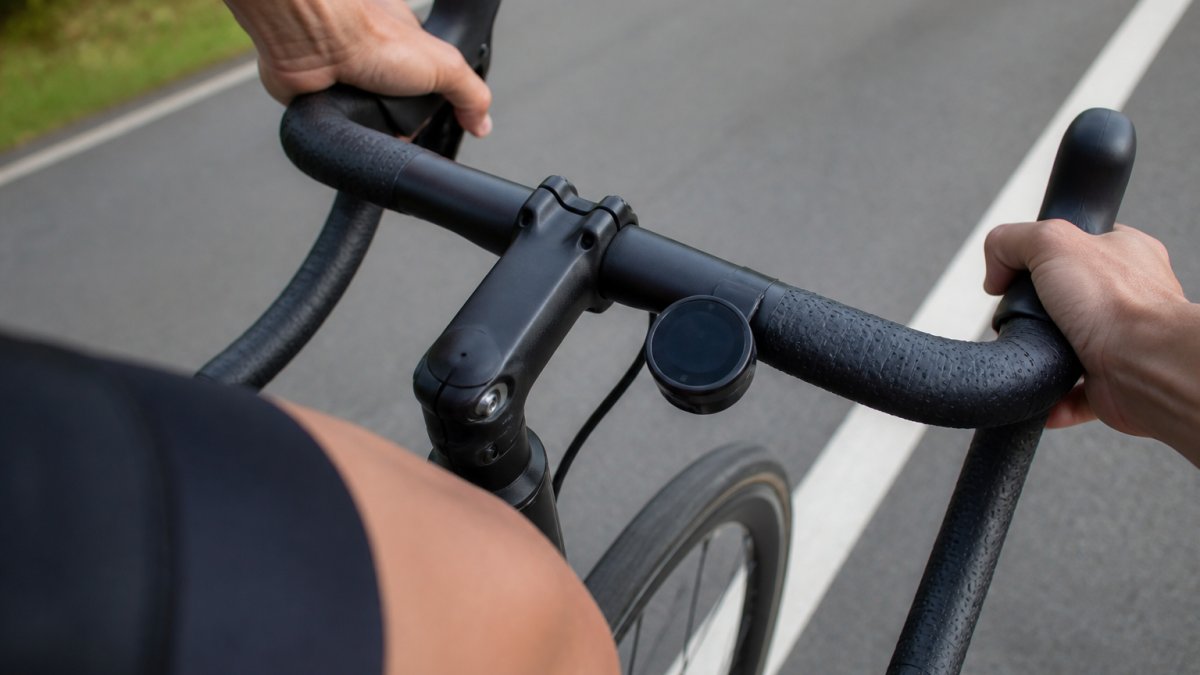
For standard bars, a simple elastic-band or clamp mount works and takes seconds to fit. For non-standard setups, you have two better options:
- Stem cap mount: Replaces your headset top cap and sits flush with the stem, which keeps the cockpit clean and works when the bars have no free round section.
- Out-front or universal mount: Uses strong elastic bands and a silicone base to grip irregular shapes without scratching the finish.
Check clearance before you buy. A mount that sits too high can foul your brake cables or your hands on the hoods.

Never trust a mount you haven't tested on a short ride first. A device that pops off at speed is gone, and you won't hear it over traffic.
Battery Life, Screen Brightness, and Signal Reliability in Practice
Battery life and screen brightness fight each other, and that's the trade-off most spec sheets hide. A brighter backlight makes the screen readable in sun but drains the battery faster: on a compact unit, the display backlight is typically the single largest power draw, ahead of the GPS chipset and processor.
The fix is simple: match brightness to conditions. On a bright day, use the highest readable setting; on an overcast commute, drop it a notch. Most devices let you adjust on the fly, and some offer auto-brightness.
A few habits that stretch a charge without hurting readability:
- Set a screen timeout. A display that dims or sleeps between turns can add meaningful time to a ride. You only need it lit when a cue is coming.
- Turn off unnecessary radios. Wi-Fi and Bluetooth scanning in the background cost power. Pair your sensors once, then leave the radios in their low-power state.
- Skip live tracking if you don't need it. Continuous position uploads keep the cellular or Bluetooth link active and drain both the head unit and the paired phone.
Navigation Latency and Rerouting Lag in Dense Environments
Satellite signal is the other variable, and the one most guides ignore. In dense urban canyons or heavy forest cover, GPS accuracy drops and rerouting can lag.
A GPS receiver needs a clear line of sight to several satellites to fix your position.
A few things separate a device that handles this well from one that doesn't:
- Antenna quality and placement. A well-tuned antenna holds a fix longer in marginal conditions. This is one of the few specs where a compact unit can match a larger one, because antenna design matters more than screen size.
- A navigation compass. When satellite signal drops, a device with a compass can keep showing your heading instead of freezing the arrow. That's the difference between a brief hesitation and a full stop.
- On-device map storage. A unit that stores maps locally can reroute without waiting for a data connection. A unit that streams maps from a phone has to re-establish that link first, which adds seconds to every recalculation.
If you ride in a city with tall buildings, expect occasional delays and don't panic when the arrow hesitates.
Firmware updates also matter.
Don't judge a device's signal performance from a single ride in bad conditions. Test it on a route you know well, in the environments you actually ride, before deciding it's unreliable.
Common Mistakes When Setting Up Compact Bike Navigation
Most setup problems come from skipping steps, not faulty hardware. Here are the mistakes we see most often.
- Riding before the first full charge. A half-charged device dies early and kills your confidence in it.
- Not testing the mount. Loose mounts drop devices. Test on a short loop first.
- Importing a route without checking it. Bad GPX files send you onto highways or closed paths.
A simple, tested setup beats a feature-packed one you never learned to use. If you want a device that skips the complexity entirely, the Beeline Velo 2 is built around a bright screen, an intuitive interface, and app-based routing that keeps your phone in your pocket. For tighter cockpits, the Stem Cap Mount fits non-standard bars, and the Carry Case protects everything between rides.

Frequently Asked Questions
What is a good small navigation device for a bike?
A good small device shows turn-by-turn directions without dominating your handlebars. Look for a compact form factor, a bright screen readable in daylight, and simple controls you can use with gloves. The Beeline Velo 2 at $99.00 includes a universal handlebar mount, USB-C cable, and quick start guide. It pairs with your phone app for route planning, so you get navigation without a bulky unit or a complicated menu system.
Do I need a dedicated GPS unit or just a smartphone for road cycling?
A smartphone works for occasional rides, but battery drain, screen glare, and vibration risk make it a compromise on longer road rides. A dedicated unit like the Beeline Velo 2 keeps your phone stowed and safe while still delivering turn-by-turn navigation. If you ride several times a week, the dedicated device usually wins on battery efficiency and mounting security. If you ride once a month, a phone and a free app may be enough.
How long does it take to set up compact bike navigation?
Setup for most compact units takes under 15 minutes. Charge the device, install the mount on your handlebars, download the companion app, and pair via Bluetooth. The Beeline Velo 2 ships with a universal mount and quick start guide, so you can attach it and ride the same day. Plan your first route in the app before you leave, then test a short familiar loop to confirm the turn prompts match your expectations.
Will compact navigation work with my existing bike computer for tracking stats?
It depends on the device. Some compact units focus on navigation only, while others also log speed, distance, and elevation. The Beeline Velo 2 handles both navigation and activity tracking through its app, so you can review ride data after your route. If you already own a computer for cycling metrics, check whether the new device supports ANT+ or Bluetooth connectivity before assuming the two will sync cleanly.
Compact navigation only works when the setup is right: the mount is secure, the route is checked, and the screen is readable at a glance. That's the whole point of choosing a small device over a cluttered cockpit. Beeline Velo builds for exactly that rider, with a compact, well-priced device, a simple interface, and app-based turn-by-turn guidance that keeps you focused on the road. Shop the Velo 2 and start discovering new routes without the fuss.