
How to Find Bike-Friendly Routes: A 2026 Guide
Table of Contents
- Why Finding Bike-Friendly Routes Matters
- Step 1: Choose Your Route Planning Tool
- Best Bike Navigation Apps for Finding Safe Routes
- Step 2: Identify Protected Bike Lanes and Dedicated Paths
- How to Plan a Safe Bike Commute Using Route Editors
- Step 3: Filter Routes by Safety and Terrain
- Step 4: Test Your Route and Adjust
- Frequently Asked Questions
Last Updated: September 18, 2026
Why Finding Bike-Friendly Routes Matters
Finding bike-friendly routes keeps you safe, saves time, and helps you discover new areas. The right navigation transforms how you ride.
Most cyclists choose the shortest route on a map, but direct streets often force you into heavy traffic. Bike-friendly routes use protected bike lanes, dedicated paths, and low-traffic streets designed for cycling safety.
Cyclists using intentional routing report fewer near-misses, less stress, and more enjoyment on every ride.
Step 1: Choose Your Route Planning Tool
Your choice depends on what matters most: speed, safety, or simplicity. Different apps and devices excel at different tasks.
Route planning tools fall into two categories: smartphone apps (flexible, often free) and dedicated bike computers (simple, distraction-free).
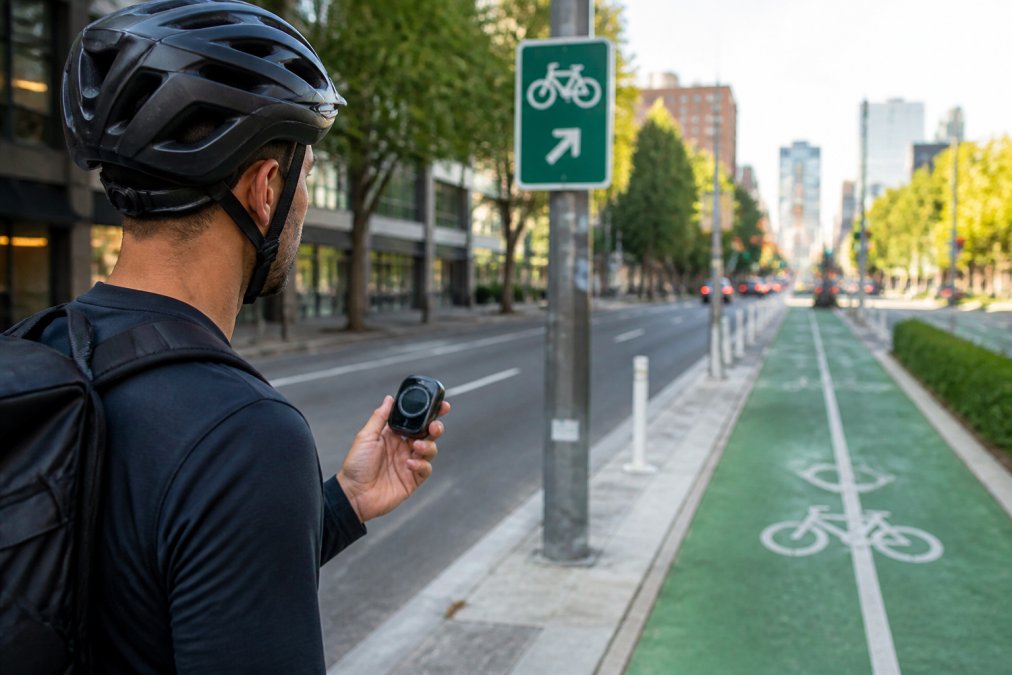
If you want turn-by-turn navigation without pulling out your phone constantly, a dedicated bike computer works best. The Beeline Velo 2 ($99.00) is a compact device with an intuitive interface, bright screen, universal handlebar mount, and USB-C charging.

If you prefer using your phone, choose an app that highlights protected infrastructure and avoids dangerous intersections. Test it on a short familiar route first to see how it handles wayfinding in your area.
Best Bike Navigation Apps for Finding Safe Routes
Apps that prioritize safety and low-stress routing:
Apps built around community and discovery:
Regional considerations:
In cities with mature bike infrastructure, most apps perform well. In suburban and rural areas, app performance varies. Check local cycling advocacy groups and city/county parks department websites for route maps that may outperform national apps.
What to look for when choosing:
- Protected infrastructure visibility: Distinct colors or symbols for protected lanes vs. painted lanes vs. shared roads
- Traffic density display: Can you see heavy car traffic at your typical riding time?
- Offline access: Download maps for areas without cell service
- Turn-by-turn navigation: Voice guidance or map view?
- Surface type information: Paved roads vs. gravel vs. unpaved paths
- Elevation profiles: See climbs before committing
- Local data quality: Check app reviews from cyclists in your area
Many cyclists use multiple apps for different purposes. Test free versions to see which matches your riding style and local infrastructure.
Step 2: Identify Protected Bike Lanes and Dedicated Paths
Protected bike lanes are separated from car traffic by physical barriers and feel safer. Dedicated paths are entirely separate from roads, giving you complete freedom from vehicle traffic.
When planning routes, prioritize these infrastructure types:
- Protected bike lanes with barriers or curbs
- Separated bike paths on their own right-of-way
- Contraflow lanes that let you ride against one-way traffic
- Quiet streets with low traffic volume
- Neighborhoods with traffic calming measures
Your route planning tool should highlight infrastructure types with different colors or line styles. A busy four-lane road with painted bike lanes feels very different from a protected lane behind a curb.
Test the infrastructure before committing. Ride it once during daylight and once during your typical commute time to notice traffic patterns and surface conditions.
How to Plan a Safe Bike Commute Using Route Editors
Route editors let you customize paths instead of accepting the algorithm's suggestion. Algorithms optimize for distance or time, not safety, you know which streets feel safest.
Set your start and end points in the route editor. The app generates an initial suggestion. Refine it by checking: Does it use protected infrastructure? Avoid major highways? Include quieter alternatives? Connect to bike-friendly paths? Click road segments to check traffic levels, surface type, and safety. Replace unsafe segments with better alternatives.
Most route editors show traffic density with lighter colors indicating fewer cars. Bias toward light-colored streets. Check elevation profiles for commutes, steep climbs are brutal for daily riding. Use the route editor to find flatter alternatives.
Step 3: Filter Routes by Safety and Terrain
Smart filtering saves time and keeps you safe. Set criteria that match your skill level, comfort, and current conditions instead of accepting the app's default route.
Filtering for skill level and experience:
Beginners and families should use aggressive safety filters: avoid highways and major roads entirely, prioritize protected bike lanes, avoid complex intersections, limit elevation gain to 50 feet per mile for daily commutes, stay on well-lit streets for dawn/dusk rides, and avoid unpaved surfaces.
Experienced cyclists can relax these filters, but still benefit from filtering out highways and prioritizing protected infrastructure.
Terrain filtering by riding style:
Your route needs match your bike type and skill:
Road cyclists want paved surfaces and minimal elevation change. Filter for "paved only" and set a maximum grade (typically 4-6% for daily commutes, up to 8-10% for weekend rides). Avoid gravel and dirt paths.
Mountain bikers need trail information. Most apps show trail difficulty (beginner, intermediate, advanced) and surface type. Filter for your skill level and preferred surface (singletrack, doubletrack, fire road). Check recent trail conditions in community forums, a muddy trail rated "intermediate" might be unrideable after rain.
E-bike riders can handle steeper terrain and longer distances, but battery range still matters. Filter for routes under your bike's range (typically 20-50 miles depending on assist level and terrain). Prioritize routes with charging stations if you're planning a long ride.
Commuters should filter for directness and consistency. You want the same route every day so it becomes automatic. Avoid routes with many turns or complex navigation. Flat or gently rolling terrain matters more than scenic views.
Seasonal and weather-based filtering:
Spring and fall: Avoid poor drainage and flooding-prone areas. Unpaved paths become muddy. Prefer paved streets.
Summer: Heat affects performance. Filter for shaded paths and water fountain access on longer rides.
Winter: Filter for well-lit main roads, unlit streets are dangerous in darkness. Avoid steep hills and untreated roads. Many cyclists shift to shorter commutes in winter.
Using local knowledge to refine filters:
Check local cycling maps and community forums. Join a local cycling group on Facebook or Reddit (search "[your city] cycling") to ask experienced commuters which routes they use. This crowdsourced knowledge often beats app data because it's current and specific to your area.
After setting filters, run a route search and examine results. Adjust filters if the app suggests routes you'd never take or excludes routes you know are safe. Use filters to narrow options, then test the top 2-3 candidates before committing to a regular commute.
Step 4: Test Your Route and Adjust
Never trust a route you haven't ridden. Test it on a weekend morning when traffic is light so you can focus on navigation and infrastructure.
Notice: Does turn-by-turn guidance work smoothly? Are intersections as safe as they appeared? Does pavement quality match the app's description? Are there hazards the map didn't show? How does traffic feel compared to the map? Take notes of problem spots and find alternatives.
Repeat the test during your actual commute time. After three or four rides, the route becomes automatic and your mind focuses on riding, not navigation.
With a dedicated device like Beeline Velo 2, testing is simpler. The device handles navigation while you focus on riding, with occasional glances instead of constantly checking your phone.
Share tested routes with other cyclists through local cycling communities and forums. You'll also discover routes others have tested and refined.
Finding bike-friendly routes takes effort upfront but pays dividends forever. Start with a dedicated navigation device or app that prioritizes cycling infrastructure. Use route editors to build paths that match your skill level. Test everything before committing and adjust based on real-world experience.
The Beeline Velo 2 simplifies this entire process. Its intuitive interface and clear navigation mean you spend less time planning and more time riding. With turn-by-turn directions and activity tracking built in, you get everything you need to discover new routes confidently. Shop Velo 2 today and transform how you navigate every journey.
Frequently Asked Questions
What is the best app for finding bike routes?
The best bike navigation apps combine GPS navigation with infrastructure data. Look for apps that show protected bike lanes, dedicated paths, and turn-by-turn directions. Many cyclists prefer compact bike computers paired with smartphone apps, this combination gives you reliable navigation without constantly checking your phone. For simplicity and clarity, devices like the Beeline Velo 2 pair straightforward navigation with offline map accessibility, keeping your focus on the road.
How do I find safe cycling routes for beginners?
Start by using route editors in navigation apps to filter for protected bike lanes and dedicated bike paths. Avoid high-traffic roads and look for streets with contraflow lanes or separated cycling infrastructure. Check your local government's bike map, most cities publish official cycling infrastructure maps. Test short routes first in low-traffic times, then gradually explore longer distances. Apps and devices that highlight elevation profile and traffic density help you choose terrain that matches your skill level.
Is there a way to see bike paths on Google Maps?
Yes. Some mapping services include a cycling layer that shows bike-friendly routes, protected lanes, and dedicated paths in most urban areas. This view may not include all local cycling infrastructure or real-time safety updates. Dedicated cycling navigation apps often provide more detailed infrastructure data and safety-focused route options. For the most accurate local information, combine general mapping services with your city's official cycling infrastructure map.
What features should I look for in a bike navigation app?
Prioritize turn-by-turn directions, offline map accessibility, and the ability to filter routes by infrastructure type (protected lanes, dedicated paths). Look for elevation profile data if you ride varied terrain, and voice navigation so you don't need to check your screen constantly. Route editors let you customize paths before riding. Consider whether you need activity tracking and integration with public transit for commute planning. A simple, intuitive interface reduces distraction while riding.