
Best Bike Navigation for Beginners: 2026 Guide
Table of Contents
- What Makes the Best Bike Navigation for Beginners
- Smartphone vs Dedicated Bike Computer: Which Is Right for You
- Beeline Velo 2: Simple Navigation Without the Complexity
- How to Use Bike Navigation Apps: Getting Started the Right Way
- Bike Computer Setup for Beginners: Installation and First Ride
- Key Features That Matter for Beginning Cyclists
- Common Mistakes Beginners Make With Bike Navigation
- Frequently Asked Questions
Last Updated: September 14, 2026
What Makes the Best Bike Navigation for Beginners
The difference between a frustrating first ride and a confident one often comes down to navigation. New cyclists face a genuine problem: most bike computers overwhelm with data you don't need yet, while smartphone apps drain battery and force constant screen-checking. New cyclists face a genuine problem: most bike computers overwhelm with data you don't need yet, while smartphone apps drain battery and force constant screen-checking.
Best bike navigation for beginners solves three core problems. First, it eliminates the mental load of route planning mid-ride. Second, it keeps your eyes on the road instead of your phone. Third, it works reliably without requiring a computer science degree to set up.
The good news: you don't need expensive gear to navigate confidently. What matters is choosing the right tool for your actual riding style, not what marketing promises.
Smartphone vs Dedicated Bike Computer: Which Is Right for You
Your phone is already in your pocket. A dedicated device seems redundant. Yet this choice defines your entire riding experience, and the answer depends more on your commute than your budget.
Smartphones excel at flexibility. Free navigation apps work everywhere, integrate with your calendar, and handle multiple tasks. But they drain battery faster than you'd expect on longer rides, require constant attention to the screen, and tempt you with notifications that distract from the road.
Dedicated bike computers solve these problems by design. They're built for one job: getting you there safely. Battery lasts days or weeks. Screens are bright enough to read in sunlight. Setup takes minutes, not hours.
When a Dedicated Device Makes Sense
A dedicated device makes sense if you ride more than twice weekly or explore unfamiliar routes (Cycling infrastructure as a determinant of cycling for recreation and transportation in...). If your commute takes over an hour, or if you're planning weekend tours beyond your home area, a dedicated device pays for itself in peace of mind alone.
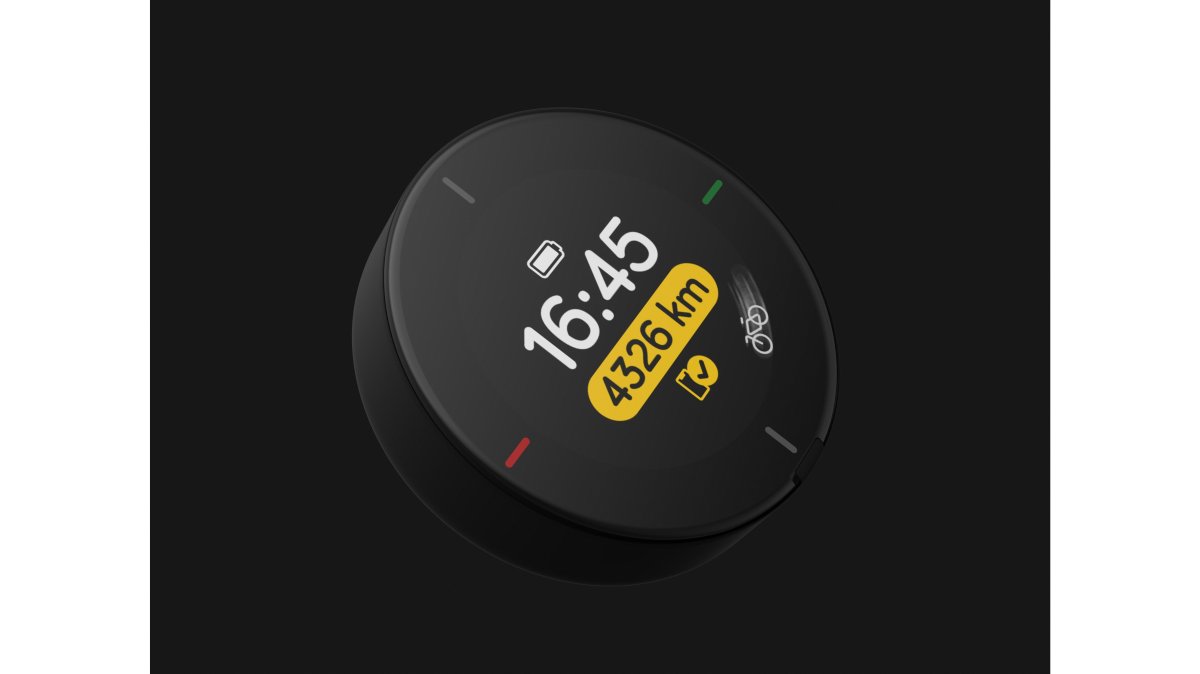
The Beeline Velo 2 ($99.00) represents the sweet spot for beginners. It's compact enough to fit in a jersey pocket, costs less than most smartphone GPS mounts, and handles turn-by-turn navigation without the complexity of full-featured cycling computers. The bright display stays readable in direct sunlight, and a single charge lasts through multiple rides (the FTC).

When Your Phone Is Enough
Your phone works fine if you stick to familiar routes or only ride on weekends. If you're testing whether cycling is actually for you before investing in gear, start with your phone. Free apps like those available through major platforms provide basic navigation without commitment.
The real limitation isn't features, it's reliability. Phones overheat in summer, drain battery unpredictably, and force you to stop and check the screen at intersections (Smartphone Sensor Battery Consumption: A Standardized and Reproducible Test Protocol). Once you've experienced the difference a dedicated device makes, most riders don't go back.
Beeline Velo 2: Simple Navigation Without the Complexity
Simplicity is the design philosophy behind the Beeline Velo 2. This device strips away everything except what beginners actually need: clear directions, a readable screen, and a battery that lasts.
The Velo 2 delivers turn-by-turn navigation through a bright, intuitive interface. You see one instruction at a time, "turn left in 200 meters", not a map cluttered with data fields. This focus keeps your attention on the road. The device pairs with the Beeline app, which lets you plan routes on your phone before you ride, then navigate hands-free once you're moving.
Setup takes under five minutes. Mount it on your handlebars using the included universal mount, pair it with the app, and you're ready. No syncing delays, no complicated menus. The battery lasts through multiple rides on a single charge, and the USB-C cable charges it quickly between outings.

What sets the Velo 2 apart for beginners: it doesn't assume you want to track power output, cadence, or elevation gain. Those features confuse new riders. Instead, you get the core navigation experience, ride history for your own reference, and the confidence that you won't get lost.
How to Use Bike Navigation Apps: Getting Started the Right Way
Whether you choose a phone or a dedicated device, the process is similar. Most beginners make mistakes during setup that frustrate them later.
Setting Up Your First Route
Start by downloading the companion app on your phone. Create an account, this takes two minutes and requires only an email address. Search for a route you know well, or use the app's route builder to create one.
The route builder works by clicking waypoints on a map. Don't overthink this. Pick a destination, let the app suggest a bike-friendly path, then review it. Most apps default to routes that avoid highways and prioritize dedicated bike lanes. Accept the suggestion unless you know a better way.
Save the route before you ride. This matters because your phone might lose signal during the ride, but the route stays stored locally. Test the route on a short, familiar ride first. This isn't wasted time, it's how you learn whether the app's suggestions match reality in your area.
Navigation During Your Ride
Mount your device where you can glance at it without looking away from the road for more than a second. For phones, this means a handlebar mount at eye level. For dedicated devices like the Velo 2, the included universal mount positions the screen perfectly.

Start navigation before you leave. The device or app will show your current location and the next turn. Follow the voice cues if your device has them, don't rely solely on the screen. When you approach a turn, the device will alert you. Slow down, check the intersection, then turn.
If you miss a turn, don't panic. The app recalculates automatically. You'll see a new route that gets you back on track. This happens within seconds on most apps.
Bike Computer Setup for Beginners: Installation and First Ride
Physical setup matters more than most beginners realize.
Mounting Your Device Securely
Pairing and Syncing Your Data
Key Features That Matter for Beginning Cyclists
Turn-by-Turn Navigation Clarity
Battery Life and Reliability
Ease of Use Over Feature Overload
| Feature | Smartphone | Dedicated Device (Velo 2) |
|---|---|---|
| Setup Time | 10-15 minutes | Under 5 minutes |
| Battery Life | 2-4 hours navigation | 10-15 hours |
| Screen Readability | Moderate (glare issues) | Excellent (sunlight-proof) |
| Route Planning | Flexible, free apps | Simple, app-based |
| Distraction Risk | High (notifications) | Low (single purpose) |
| Cost | Free to $50/year | $99 one-time |
Common Mistakes Beginners Make With Bike Navigation
Learning what not to do accelerates your confidence.
Frequently Asked Questions
Is a dedicated bike computer better than a smartphone for bike navigation for beginners?
For beginners, a dedicated bike computer like the Beeline Velo 2 offers advantages over smartphones: it keeps your phone safely stowed, uses less battery, and provides a simpler interface focused on navigation without app notifications. However, if you already have a smartphone and don't mind carrying it, free navigation apps work fine for casual rides. The choice depends on whether you want a distraction-free experience and longer battery life during longer rides.
How do I set up bike navigation apps for my first ride?
Download a navigation app, create an account, and enter your destination. Most apps show your route on a map with turn-by-turn directions. Mount your phone securely on your handlebars using a phone holder, enable GPS and offline maps if available, and test the route before you leave. Start with familiar routes to build confidence. For dedicated devices like the Beeline Velo 2, pair it with the companion app on your phone, plan your route there, and sync it to the device.
What should I look for in bike navigation for beginners?
Focus on simplicity: clear turn-by-turn directions, a bright, readable screen, reliable GPS, and easy setup. Avoid devices packed with training metrics and complex settings that overwhelm new riders. Look for water resistance, good battery life (at least 6-8 hours for recreational rides), and a user-friendly interface. The Beeline Velo 2 is designed specifically for this, with a compact design and intuitive display that doesn't distract from your ride.
How long does it take to set up a bike computer for beginners?
Mount the device on your handlebars using the included bracket, charge it fully via USB-C, download the companion app, create an account, and pair the device to your phone via Bluetooth. Plan your first route in the app and sync it to the device. After that, future rides require just tapping 'start' on the device. Most beginners feel comfortable within their first ride or two.
Can I use bike navigation if I'm not tech-savvy?
Yes. Modern bike navigation is designed to be intuitive. Dedicated devices like the Beeline Velo 2 eliminate the complexity of smartphones, just mount it, plan your route in the app, and follow the directions on the screen. There are no settings to fiddle with daily. If you can use a smartphone, you can set up a bike navigation device. Most brands offer quick-start guides and responsive support if you get stuck.